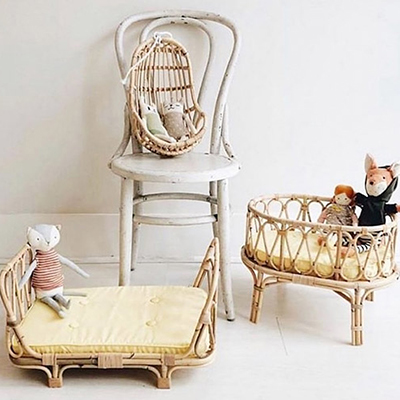
How To Build a Reborn Doll Bunk Bed

Building a doll bunk bed with your child is an elegant thing to do. Aside from gifting your child a perfect gift, you get to spend more time bonding with your child. Constructing a bunk bed for an 18-inch reborn baby doll requires some planning and design so as to ease building from start to finish.
This step by step woodworking project requires you to cut and join segments with lumber and nails. It is advisable you get the best equipment and materials you could afford. If it is something you have the money for, buying weather-resistant wood, like cedar or pine is the best option available.
Materials and equipment
Materials to be used
- 1 – 5 pieces of 1×2 wood – 18 1/2″ long LEGS
- 4 – 5 pieces of 1×2 wood – 9 1/2″ long, 2 pieces – 18″ long, 2 pieces – 12 1/4″ long RAILS
- 2 – 4 piece of 1×2 wood – 18″ long, 2 pieces – 9 1/2″ long 2xFRAME
- 3 – 2 pieces of 1×2 wood – 8″ long STEPS
- 5 – 2 pieces of 1/4″ plywood – 8″x18″ 2xFLOOR
- 100 pieces of 1 1/4″ brad nails
- 1 piece of 1/4″ plywood – 16″x18″
- 2 piece of 1×2 wood – 6′
- 3 pieces of 1×2 wood – 8′
- Glue
- Putty
- Stain
Equipment
- Tape measure
- Safety gloves
- Glasses
- Chalk line
- Spirit level
- Miter saw
- Jigsaw
- Drill machinery
- Carpentry pencil
- Drill bits
Procedures

Components for the doll bed
Subsequently printing the layout, all components should be cut at the proper size, using a mitre saw. Lumber of 1x2s should be used for the entire scheme, excluding the bottom plate, which should be of 1/4″ plywood. With many duplicative cuts, using a stop block is advisable to get uniform results. This will make assemblage easier. After making all cuts the edges should be smoothed using sandpaper, to get neat and flat joints.

Addition of glue to joints
After cutting the major components, the assemblage is next. For this, drill machinery is absolutely not needed. Glue and brad nails will do the job perfectly. Hand tools like a saw, a hammer, and a sand block are basic tools used for this.

Assembling the side rails
The next step is to assemble the side rails to make bed frames. Glue is added to one edge of the rails and then attached to the cleat giving support to the bottom of the bed frames.
After straightening the edges, 1/4″ brad nails are used to secure the components together. For a beginner, the components should be clamped together before putting in the nails to make the job easier for you.

Addition of glue to the side rails
After the side rails are assembled, the perpendicular components are connected together using glue to complete the bed frame.

Assembling the bed frames
The edges are to be straightened making sure the junctions are square before putting in the brad nails. For a standard result, the gaps between the units should be very minimal. With these steps, a bed frame is completed.

Completing the bed frames
The second best frame should be built using the same procedures as above. It is of importance that the two frames should be similar, otherwise the bunk bed won’t have an elegant structure.

Attaching the legs
Set the doll bed legs on a levelled surface and straighten to the ends. The lower bed frame is then fitted into place just 2″ from the edge. The edges are to be aligned to make sure the junctions are squared. 1/4″ brad nails are used to fasten the units together.

Assembling the doll bunk bed
The next step is to join the crown bed frame to the legs, making sure the edges are aligned in a skilled manner. Glue and 1/4″ nails are inserted to the joints to strengthen the joint of the components.

Fitting the opposite legs
1×2 legs are fastened to the other side of the bed frames.

Fitting the ladder support
The support for the ladder is fitted to the whole structure using the brad nails. A clamp is used to hold the units together while inserting the brad nails. The width of the ladder can easily be adjusted to meet your requirements.

Attaching the headboard
The 1×2 slats are attached to the headboard and the footboard of the crown bed frame. The edges have to be aligned before putting in the finishing nails.

Attaching the top bed frame
Attach the 1×2 rails to the top bed frame and fit the rails to the opposite side, as well.

Fitting the steps
Fit the steps to the ladder supports. In addition, use glue and 1 1/4” brad nails to secure the steps into place.
Precautions
It is important you take detailed measurements before modifying the unit size to the standard length. To prevent the wood from splitting, pilot holes should be drilled through the units before putting in the screws.
After the bunk bed for the doll is completed, the only thing left to do is to put finishing touches. Smoothing the edges with sandpaper and applying some stain should improve the appearance of the wood.